
목차
-
1. Collection view 생성
-
2. Custom Cell에 대한 class 생성
-
3. Xib 파일 생성
-
4. File's Owner, Custom Class 란에 방금 생성한 custom cell의 class 입력
-
5. 재사용 식별자 등록(여기선 "cell" 로 등록, 원하는 아무 문자로 설정해도 됨)
-
6. 재사용할 형태로 만들고, 추가한 요소들 IBOutlet 연결
-
7. collectionView를 사용하는 class 내부 didLoad 밑에 custom cell의 class 이름(여기선 CardCollectionViewCell), 재사용 식별자(여기선 cell) 넣어서 얻은 nib name 으로 collectionView.register 등록
-
8. xib에서 만든 custom cell을 쓸 수 있다.
1. Collection view 생성

2. Custom Cell에 대한 class 생성

3. Xib 파일 생성

4. File's Owner, Custom Class 란에 방금 생성한 custom cell의 class 입력


5. 재사용 식별자 등록(여기선 "cell" 로 등록, 원하는 아무 문자로 설정해도 됨)
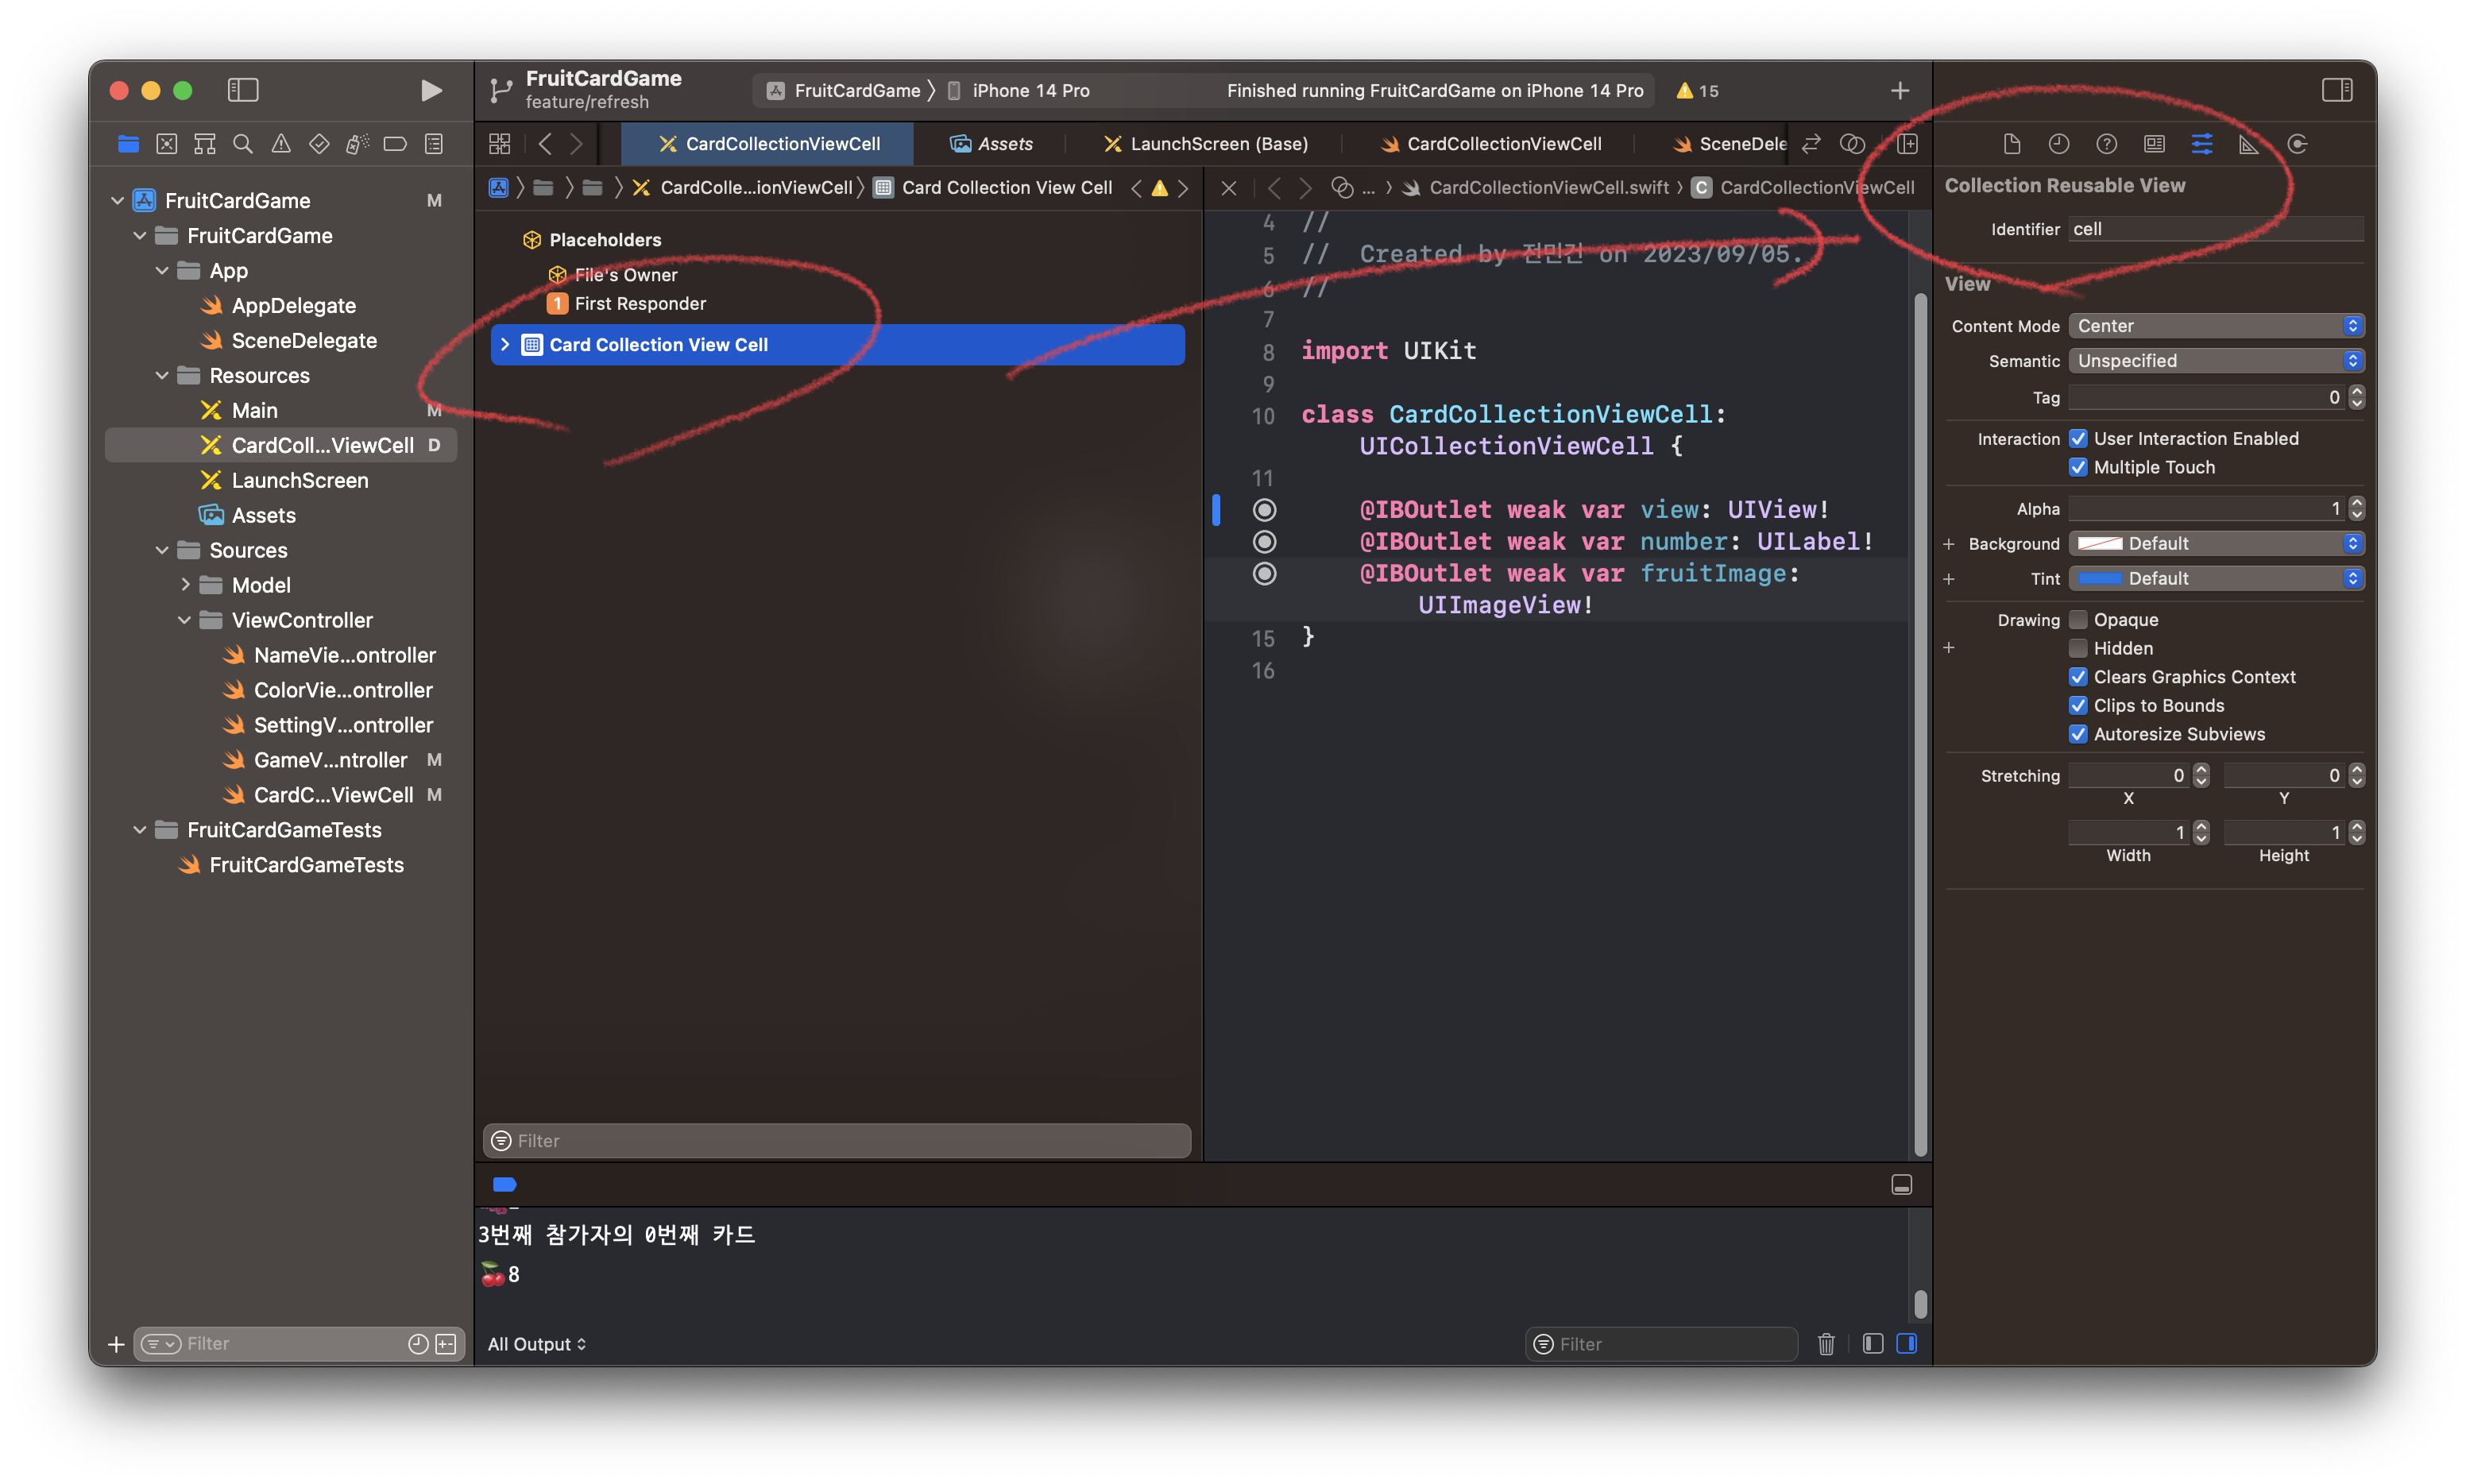
6. 재사용할 형태로 만들고, 추가한 요소들 IBOutlet 연결

7. collectionView를 사용하는 class 내부 didLoad 밑에 custom cell의 class 이름(여기선 CardCollectionViewCell), 재사용 식별자(여기선 cell) 넣어서 얻은 nib name 으로 collectionView.register 등록
override func viewDidLoad() {
        super.viewDidLoad()

        let nibName = UINib(nibName: "CardCollectionViewCell", bundle: nil)
        self.collectionView.register(nibName, forCellWithReuseIdentifier: "cell")

    }
8. xib에서 만든 custom cell을 쓸 수 있다.
func collectionView(_ collectionView: UICollectionView, cellForItemAt indexPath: IndexPath) -> UICollectionViewCell {

//custom cell 가져오기
        guard let cell = collectionView.dequeueReusableCell(withReuseIdentifier: "cell", for: indexPath) as? CardCollectionViewCell else {
            return UICollectionViewCell()
        }

//용도에 맞게 사용
        if indexPath.section == 0 {
            cell.number.text = game.players[indexPath.row].name
        }
        else if let card = game.getPlayerCard(playerIndex: indexPath.row, cardIndex: indexPath.section - 1) {
            cell.fruitImage.image = UIImage(named: card.fruit.rawValue)
            cell.number.text = card.number.getNumberString() + "(\(String(indexPath.row)),\(String(indexPath.section)))"
        } else {
            cell.number.text = "(\(String(indexPath.row)),\(String(indexPath.section)))"
            cell.fruitImage.image = nil
        }
        return cell
}'🍎 Apple > iOS' 카테고리의 다른 글
| [iOS] struct도 encoding을 해야한다. (0) | 2023.10.01 |
|---|---|
| [iOS] 가로모드만 지원하도록 설정하는 방법 (0) | 2023.09.25 |
| [iOS] multiple scene 설정하기 (0) | 2023.09.21 |
| [Swift, XCTest] XCTest에서 테스트할 모듈 import 해주기 (0) | 2023.08.31 |
| [Swift, XCTest] 프로젝트에 만들었던 unit test bundle 지우기 (0) | 2023.08.31 |
1. Collection view 생성
2. Custom Cell에 대한 class 생성
3. Xib 파일 생성
4. File's Owner, Custom Class 란에 방금 생성한 custom cell의 class 입력
5. 재사용 식별자 등록(여기선 "cell" 로 등록, 원하는 아무 문자로 설정해도 됨)
6. 재사용할 형태로 만들고, 추가한 요소들 IBOutlet 연결
7. collectionView를 사용하는 class 내부 didLoad 밑에 custom cell의 class 이름(여기선 CardCollectionViewCell), 재사용 식별자(여기선 cell) 넣어서 얻은 nib name 으로 collectionView.register 등록
override func viewDidLoad() {
        super.viewDidLoad()

        let nibName = UINib(nibName: "CardCollectionViewCell", bundle: nil)
        self.collectionView.register(nibName, forCellWithReuseIdentifier: "cell")

    }
8. xib에서 만든 custom cell을 쓸 수 있다.
func collectionView(_ collectionView: UICollectionView, cellForItemAt indexPath: IndexPath) -> UICollectionViewCell {

//custom cell 가져오기
        guard let cell = collectionView.dequeueReusableCell(withReuseIdentifier: "cell", for: indexPath) as? CardCollectionViewCell else {
            return UICollectionViewCell()
        }

//용도에 맞게 사용
        if indexPath.section == 0 {
            cell.number.text = game.players[indexPath.row].name
        }
        else if let card = game.getPlayerCard(playerIndex: indexPath.row, cardIndex: indexPath.section - 1) {
            cell.fruitImage.image = UIImage(named: card.fruit.rawValue)
            cell.number.text = card.number.getNumberString() + "(\(String(indexPath.row)),\(String(indexPath.section)))"
        } else {
            cell.number.text = "(\(String(indexPath.row)),\(String(indexPath.section)))"
            cell.fruitImage.image = nil
        }
        return cell
}'🍎 Apple > iOS' 카테고리의 다른 글
| [iOS] struct도 encoding을 해야한다. (0) | 2023.10.01 |
|---|---|
| [iOS] 가로모드만 지원하도록 설정하는 방법 (0) | 2023.09.25 |
| [iOS] multiple scene 설정하기 (0) | 2023.09.21 |
| [Swift, XCTest] XCTest에서 테스트할 모듈 import 해주기 (0) | 2023.08.31 |
| [Swift, XCTest] 프로젝트에 만들었던 unit test bundle 지우기 (0) | 2023.08.31 |